TornadoFX+Exposed pt. 2: Showing a database table
Posted by Simon Larsén in Programming
Welcome to the second part of the TornadoFX+Exposed series of articles. In this
part, we'll take a look at how to create a TornadoFX view for the Categories
table. In the next part, we'll expand upon the view and make it possible to
add, edit and delete rows.
The full source code is available on GitHub
Article index
- Project and database setup
- Showing a database table -- This part!
- Adding, editing and removing rows
Creating a table view
To be able to view the Categories table, we're going to need three things:
- A view model to wrap
Categoryinstances. We can actually get away without having a model, but having a model greatly simplifies some of the operations we will implement in the next article. - A controller for interacting with the database
- A view for displaying the data.
We will do all of this in a new file called categoryview.kt. Let's start with
the view model, as it is by far the simplest component.
An ItemViewModel wrapper for Category
For this, we'll extend a utility class called ItemViewModel (you can read
about it in detail in the
TornadoFX guide.
It will simply look like this:
import tornadofx.*

class CategoryModel : ItemViewModel<Category>() {
    val name = bind(Category::name)
    val description = bind(Category::description)
}
This is essentially a proxy for the Category class, acting as a middle-man
between the presentation layer and the database access layer. Any change we
make to a CategoryModel in the GUI will be stored in the model alone, and
will only propagate to the underlying Category object when we commit the
change(s). This is very convenient, as it allows us to buffer changes and then
commit all of them in a single database transaction, instead of having one
transaction per change. Now, let's move on to the controller.
The database controller
The controller is also fairly simple. Initially, it will only be able to fetch items from the database. In the next article, we will extend the controller with add and delete-functionality. Here's the initial version of the controller:
import javafx.collections.ObservableList
import java.sql.Connection
import org.jetbrains.exposed.sql.Database
import org.jetbrains.exposed.sql.transactions.transaction
import org.jetbrains.exposed.sql.transactions.TransactionManager

class DBController : Controller() {
    val categories: ObservableList<CategoryModel> by lazy {
        transaction {
            Category.all().map {
                CategoryModel().apply {
                    item = it
                }
            }.observable()
        }
    }

    init {
        Database.connect("jdbc:sqlite:file:data.sqlite", driver = "org.sqlite.JDBC")
        TransactionManager.manager.defaultIsolationLevel = Connection.TRANSACTION_SERIALIZABLE
    }
}
The categories property is lazily initialized to a fetch from the database,
in which all Category DAOs are wrapped in CategoryModels. There's a bit of
a trade-off here: it's more efficient to fetch the whole table only once and
then maintain the state with any objects that are added or init contains
precisely the same database connection setup that we used in the first article.
Let's move on to the actual view.
The table view
For the table view, we're going to use a TableViewEditModel instead of a
plain TableView. The reason is that the TableViewEditModel has some
additional functionality, most notably the ability to edit rows directly in the
table. Again, you can read up on the details in the
TornadoFX guide. Our initial attempt looks like this:
class CategoryEditor : View("Categories") {
    val dbController: DBController by inject()
    var categoryTable: TableViewEditModel<CategoryModel> by singleAssign()
    var categories: ObservableList<CategoryModel> by singleAssign()

    override val root = borderpane {
        categories = dbController.categories

        center = tableview<CategoryModel> {
            categoryTable = editModel
            items = categories

            column("Name", CategoryModel::name)
            column("Description", CategoryModel::description)
        }
    }
}
There's not too much going on here. The three properties store references to
the controller, the table view, and the list of categories. The view itself is
not very eventful either, we simply fetch the categories using the controller
and initialize the table view. Note that editModel and items are properties
of the TableViewEditModel, where the former is a reference to the table and
the latter the property containing the items of the table (which we set to the
categories observable list). Later, when we wish to update the table, we
simply work with the categories list. Don't worry that there are some unused
references here, we will put them to use in the next article.
Creating a runnable app
Now, we just need to make the app runnable. That's as simple as adding the following:
class Kuizzy : App(CategoryEditor::class)


fun main(args: Array<String>) {
    launch<Kuizzy>(args)
}
Running the main method will start the app, and you should then see a view that looks something like this:
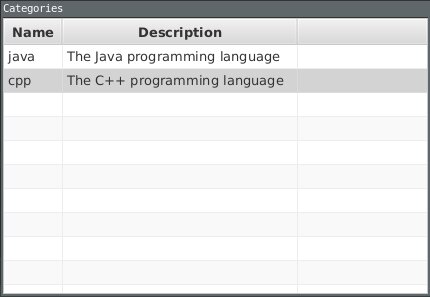
That's pretty much it for this part. In the next and final part, we'll look
into how to add, delete and edit rows of the Categories table. You can find
part 3 here.