TornadoFX+Exposed pt. 3: Adding, editing and removing rows
Posted by Simon Larsén in Programming
Welcome to the third and final part in this article series on using TornadoFX
together with Exposed. In the previous two parts, we set up the database with a
single table and created a simple TornadoFX view with which we could view its
contents. Now, we will focus on adding and deleting rows to the Categories
table, as well as adding new ones. This part is a bit longer than the two
previous ones, but it also contains a whole lot more content.
The full source code is available on GitHub
Article index
- Project and database setup
- Showing a database table
- Adding, editing and removing rows -- This part!
Making the app interactive
So far, all we can do with our app is view the contents of the database. That's neat and all, but it would be even nicer if we could interact with the database and edit its contents. What this article will address is how to:
- Delete rows.
- Add rows.
- Edit rows.
Deleting rows is the simplest thing to accomplish, so let's start with that.
Deleting rows
Deleting a row is pretty easy. First, we'll add the desired functionality to the controller.
fun deleteCategory(model: CategoryModel) {
    transaction {
        model.item.delete()
    }
    categories.remove(model)
}
Note that model.item returns the backing Category object, on which we
simply call delete() to remove it from the database. Then, we also have to
update our local list by removing the model from it. Note that I assume model
to be in the categories list for the sake of simplicity, but this is a pretty
bold assumption that you probably should not make in a real application. Now,
let's put this new functionality to work: we need to add a button to the view
that calls the delete function on the currently selected row. We will slightly
alter the layout to make this happen. We change this:
override val root = borderpane {
    categories = dbController.categories

    center = tableview<CategoryModel> {
        categoryTable = editModel
        items = categories

        column("Name", CategoryModel::name)
        column("Description", CategoryModel::description)
    }
}
to this:
override val root = borderpane {
    categories = dbController.categories

    center = vbox {
        buttonbar {
            button("DELETE SELECTED") {
                action {
                    val model = categoryTable.tableView.selectedItem
                    when (model) {
                        null -> return@action
                        else -> dbController.deleteCategory(model)
                    }
                }
            }
        }
        tableview<CategoryModel> {
            categoryTable = editModel
            items = categories

            column("Name", CategoryModel::name)
            column("Description", CategoryModel::description)
        }
    }
}
We use a buttonbar as we will be adding more buttons later on. The code should
be fairly easy to read: the button's action will do nothing if the currently
selected model is null (i.e. nothing is selected), and call the
deleteCategory method otherwise. You should now have a view looking something
like this:
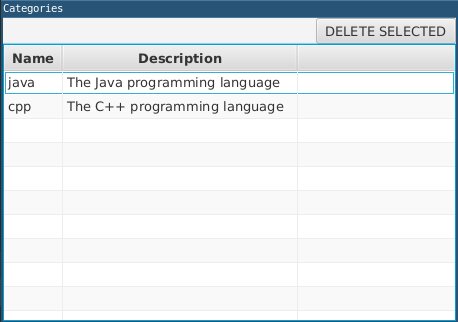
If you first click a row and then the delete button, the row should disappear. Now that we can delete rows, let's turn our attention to adding new rows.
Adding new rows
For this, we're going to add a small form to the right of the table which will allow us to enter new rows. As before, we'll start with the controller, adding the following method to it:
fun addCategory(name: String, description: String) {
    transaction {
        val category = Category.new {
            this.name = name
            this.description = description
        }
        categories.add(
            CategoryModel().apply {
                item = category
            })
    }
}
Here, we first create a new Category, and then add it to the categories
list (wrapped in a CategoryModel). Now, we need to add the form to the view
so we can submit the values for name and description. First, we need to add
two new properties to the CategoryEditor view:
var nameField: TextField by singleAssign()
var descriptionField: TextField by singleAssign()
We need these to be able to access what we put in the form fields. We also
need to import TextField
import javafx.scene.control.TextField
To add the actual form, we put the following after the center element:
right = form {
    fieldset {
        field("Name") {
            textfield {
                nameField = this
            }
        }
    }
    fieldset {
        field("Description") {
            textfield {
                descriptionField = this
            }
        }
    }
    button("ADD CATEGORY") {
        action {
            dbController.addCategory(nameField.text, descriptionField.text)
            nameField.text = ""
            descriptionField.text = ""
        }
    }
}
This will result in a view looking something like this:
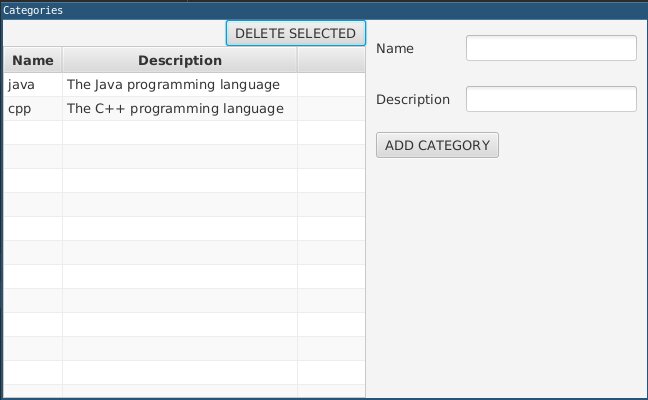
Writing some stuff in the fields and clicking ADD CATEGORY should immediately
create a new row in the table. Not the most beautiful thing in the world, I'll
admit, but it serves its purpose for this guide. Now we only have one more
feature to add, namely editing rows.
Editing rows
Now we will finally see why we used a TableViewEditModel instead of a plain
TableView: the former allows us to edit rows directly in the table. To allow
for inline editing, we need to add some stuff to the view itself. Our table
view currently looks like this:
tableview<CategoryModel> {
    categoryTable = editModel
    items = categories

    column("Name", CategoryModel::name)
    column("Description", CategoryModel::description)
}
To enable editing, we simply add a call to enableCellEditing(), and call
makeEditable() on the columns. We'll also add enableDirtyTracking() to
allow us to see which cells have been edited, but not saved.
tableview<CategoryModel> {
    categoryTable = editModel
    items = categories

    enableCellEditing()
    enableDirtyTracking()

    column("Name", CategoryModel::name).makeEditable()
    column("Description", CategoryModel::description).makeEditable()
}
Now, we can edit cells by clicking them:
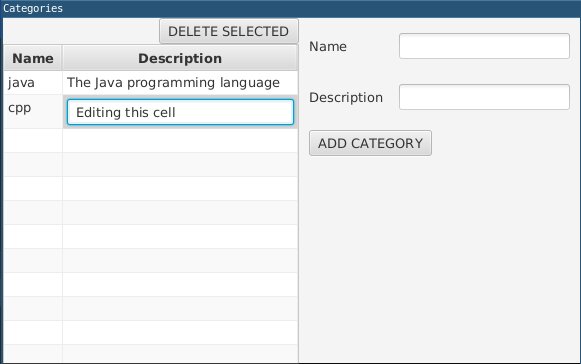
And after pressing enter, we can see that the cell has been edited by the blue triangle. The cell is dirty:
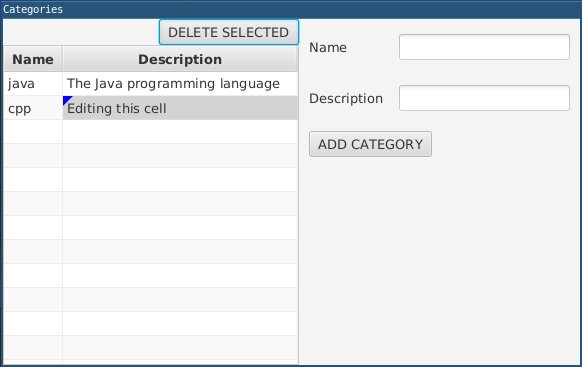
However, the change won't "stick". If we restart the application, the text will be back to what it was before we edited the cell. The reason is that the change was never committed to the database, it was just stored in the model. Thus, what we need now is to commit any dirty rows to the database. As always, we start with adding the functionality we need from the controller.
fun commitDirty(modelDirtyMappings: Sequence<Map.Entry<CategoryModel, TableColumnDirtyState<CategoryModel>>>) {
    transaction {
        modelDirtyMappings.filter { it.value.isDirty }.forEach {
            it.key.commit()     // commit value to database
            it.value.commit()   // clear dirty state
        }
    }
}
This function iterates over a sequence of map entries that map a model (key) to a dirty state (value). We'll soon see that we can get such a map from the table view. Note that committing the key must be done in a transaction, as it will write to the database. The type is a bit of a mouthful, though, so let's define a type alias for it.
typealias ModelToDirtyState = Map.Entry<CategoryModel, TableColumnDirtyState<CategoryModel>>
Note that the typealias must be a top level declaration (i.e. you can't put
it in a class or function). And rewrite the header of commitDirty like this:
fun commitDirty(modelDirtyMappings: Sequence<ModelToDirtyState>)
Slightly more readable, right? Now, let's put it to use. We'll add a new button in the button bar to execute the commit.
button("COMMIT") {
    action {
        dbController.commitDirty(categoryTable.items.asSequence())
    }
}
Clicking this button when there are dirty cells will allow us to commit these to the database. As a finishing touch, we'll add a button to reset (rollback) dirty cells to their previous state.
button("ROLLBACK") {
    action {
        categoryTable.rollback()
    }
}
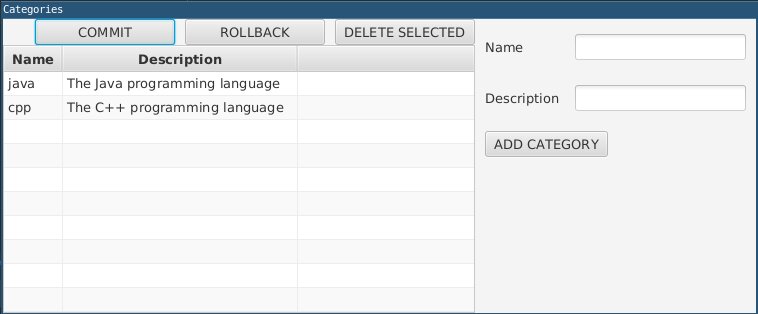
Note that this does not require a transaction, as all that happens is that the model state is reset (the DAO is unaffected). This will leave us with a final GUI looking like this:
Closing words
That was all for this series of articles on TornadoFX and exposed. This is by no means a fully-fledged database UI, but it is a pretty good start. There are tons of things here that need to be improved, though. Below are a few examples off the top of my head.
- There is just about no error handling, everything is just assumed to work out. For example, if a user enters a duplicate category, an unhandled exception is raised.
- Much of the functionality is very specific to the
Categorytype, and needs to be generalized. As a lot of this is done with generics, such generalization is actually not trivial (as generic types are invariant by default). - There is a lot of room for user error. For example, deleting a row is done without prompting the user with something like "Are you sure you wanna do this?". The commit/rollback functionality of editing is much more user friendly and a step in the right direction.
- The views are completely unstyled and look rather dull.
And with that, I wish you good fortune in working with this! Of course, you are free to use all of these examples as you see fit.